
Are you a Power Apps user who’s ever found themselves wondering where their uploaded images and files go in Dataverse? It’s a valid question, as understanding where your data is stored is key to keeping it organized, easily accessible, and secure.
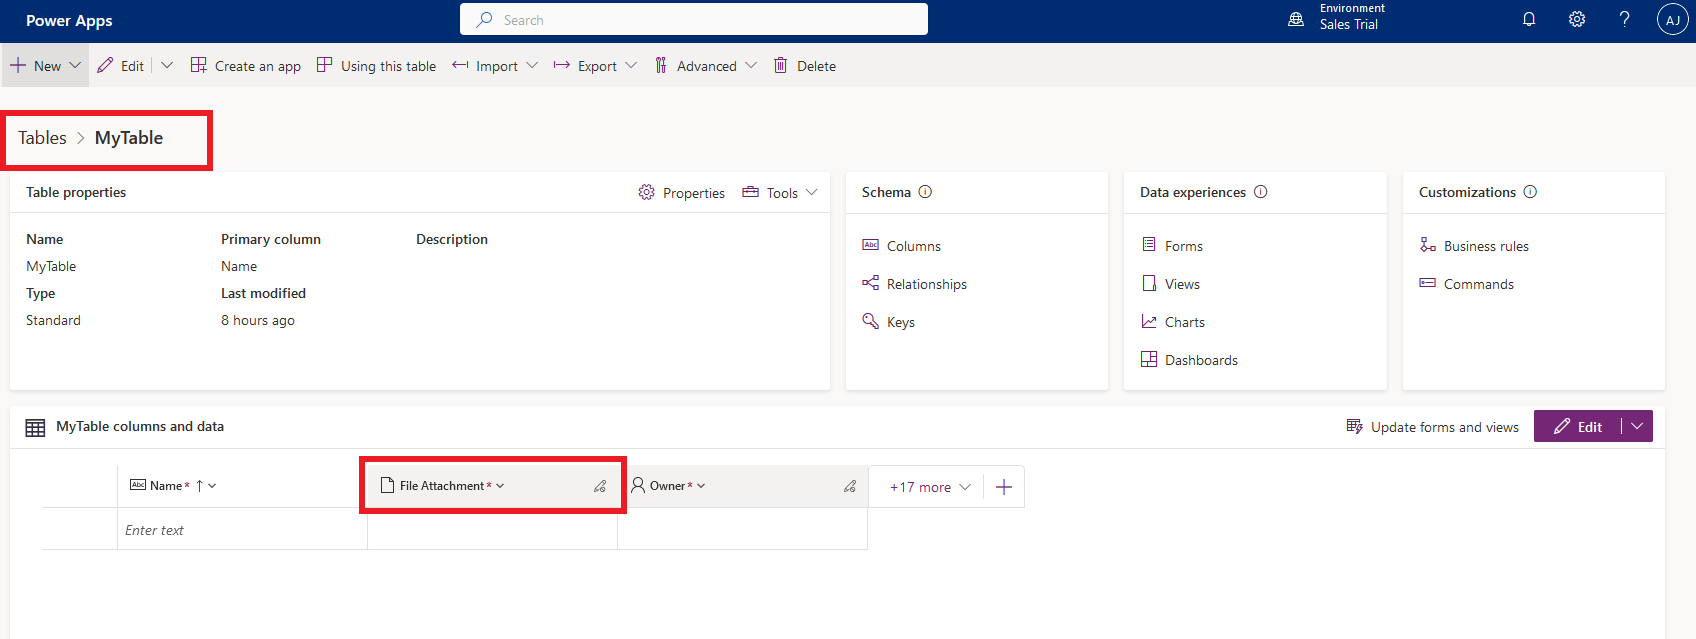
While it’s true that your app data is stored in Dataverse tables, the process of managing and retrieving it is more intricate than it may seem. So, to help you gain a better understanding of how it all works, let’s dive into an example together. We’ll be exploring a custom table called “MyTable” and a custom field known as “File Attachment,” which uses the data type File.
Let’s add some data to this table using a form. Here’s an example of what it might look like:
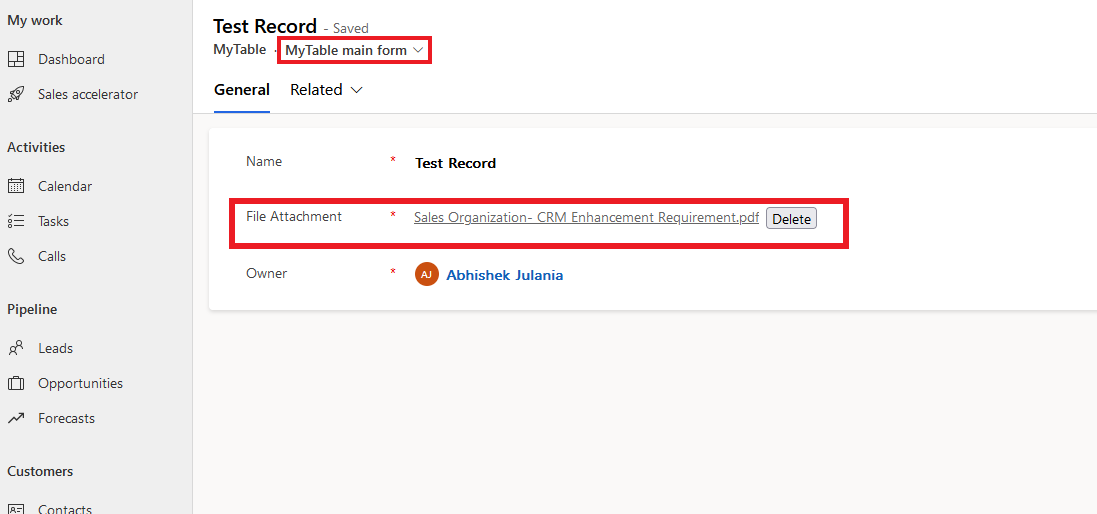
As you can see from the example, I’ve added some test data to MyTable form and uploaded a PDF file to the File Attachment field using the upload feature. However, if you need to download these files in bulk, there’s no straightforward way to do it. Although you can download individual files by going to an individual record, you cannot access all files through the Power Apps portal.
Luckily, you can use Power Automate or Dataverse APIs to access these files. In this blog, I’ll cover a Power Automate flow that can help you download these files to your Sharepoint, One Drive or local machine.
Here’s what the flow looks like: I’ve used a Manual Trigger for this example, but you can use a Manual or Automatic trigger depending on your needs.
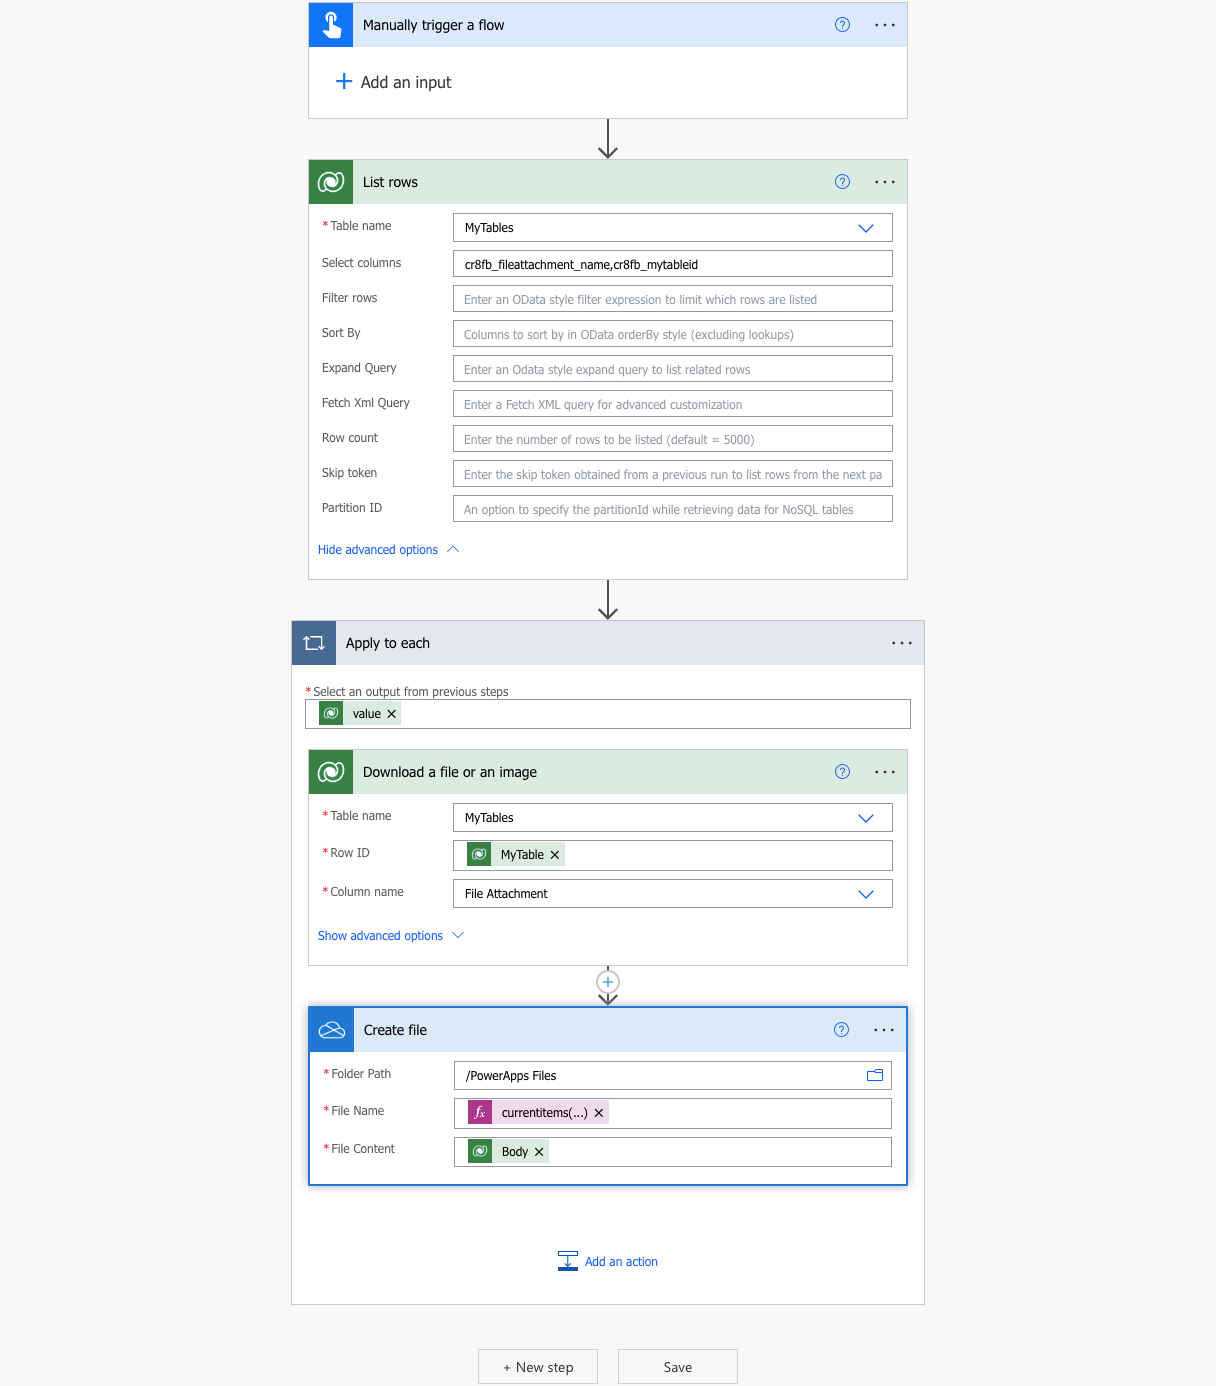
After the Trigger step, the following steps should be added in the same order-
- Use the “List Rows” action to retrieve records from our custom Dataverse table. You can filter out unnecessary columns by selecting the “Select Columns” field. For instance, if you only need the “File Attachment” column from the “MyTable” table, you would select that table and then select the schema name and the Column ID (GUID) schema name for that column.
- Use the “Download a File or an Image” action to download the file associated with a specific record in our Dataverse table. You will need to select the same custom table name you created and in the Row ID field, select the unique identifier of the entity instance from Dynamic Content. In this case, it’s “MyTable”. Then, in the Column name field, select the column you created with the datatype File.
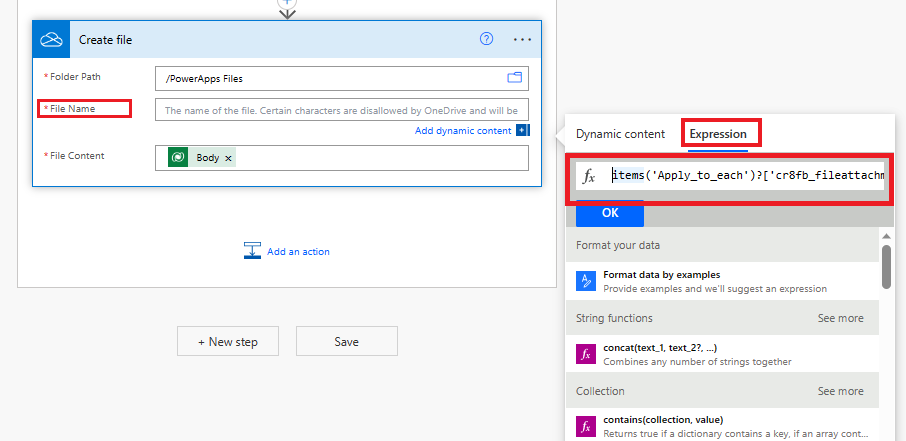
- Decide where you want to save the downloaded file. For this demo, we will be using the OneDrive connector. Use the “Create a File” action and select the OneDrive folder path where you want the file to be downloaded. Select the “File or Image Content” from Dynamic Content, which will be the output of our previous step. For the File Name, use an expression utilizing Items selected from Dynamic Content and then add the custom field name’s schema name that we had selected in step 2, separated by a ‘?’. This will name the file the same as the original file name.
After the flow is successfully executed, you should see the file downloaded at the OneDrive folder location with the same name as the original file name. Now, you can easily keep track of all your important files and access them in one convenient location.

So, what are you waiting for? Give this flow a try and see how it can benefit you and your organization. Don’t forget to share your feedback and experiences in the comments below. Thank you for reading!
Leave a Reply